Photogrammetry is an incredible technique that allows us to map and measure objects and terrain from high above. We’re talking surveying, construction, environmental monitoring, you name it! And now, with the power of drones, photogrammetry is more accessible than ever before. That’s right, drones have made it easier and more affordable for hobbyists and professionals alike to tap into this amazing technology. So, let’s dive in and learn the basics of using drones for photogrammetry in this guide. And trust me, it’s gonna be epic!
Definition
Photogrammetry is a technique of mapping and measuring objects and terrain from aerial photographs. It involves capturing overlapping photos of an object or area from different angles, and then processing them with software to create a 3D model or map.
Understanding Drones for Photogrammetry
- Definition of drones
Drones are remote-controlled or autonomous flying vehicles with sensors and cameras for capturing aerial images and data. This data is then used to create maps and 3D models of surveyed areas.
- Types of drones used for photogrammetry (fixed-wing vs. multirotor)
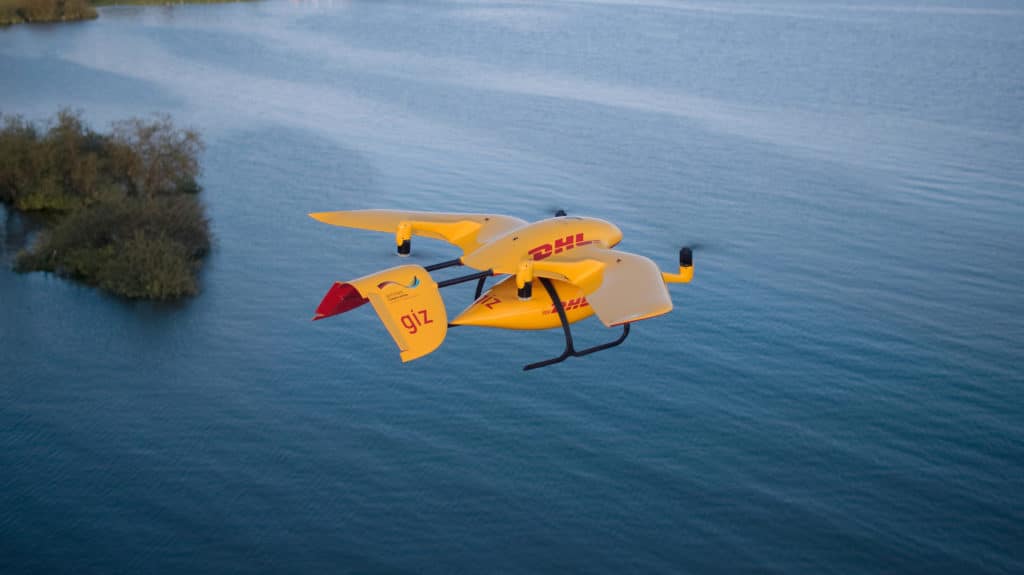
There are two main types of drones used for photogrammetry: fixed-wing and quadcopter. Fixed-wing drones have a longer flight time and can cover larger areas, making them ideal for mapping large tracts of land.Multirotors, on the other hand, are more maneuverable and can be used for mapping smaller areas or areas with complex terrain.
Although there are VTOL drones available, they essentially function like fixed-wing drones for the purpose of the data capture.
- Features to look for in a drone for photogrammetry (GPS, camera quality, flight time)
When selecting a drone for photogrammetry, there are several key features to consider. GPS is important for accurate positioning and navigation. Camera quality is also crucial for capturing high-quality images that can be used for mapping and modeling. Flight time is another important consideration, as longer flight times allow for more area to be covered in a single flight.
In the Defining Drones opinion, it’s best to choose a drone that does not have a fixed camera. Flexibility is important as you grow and learn. Your data quality needs may vary, so it’s best to invest in a platform that you can customise to suit your needs over time.
Preparing for Photogrammetry
- Planning a mission (determining area to map, setting flight parameters, ensuring safety)
Planning a mission is crucial for achieving accurate and comprehensive photogrammetry results. You need to determine the area to map, set flight parameters, and ensure safety measures are in place. By defining these parameters beforehand, you can maximize the effectiveness of your drone and minimize errors in data collection. With drones, photogrammetry has become more accessible and affordable for hobbyists and professionals alike.
- Selecting the right camera settings (shutter speed, aperture, ISO)
Choosing the right camera settings is essential to produce high-quality photogrammetry results. You need to consider the shutter speed, aperture, and ISO when taking photos from the drone’s camera. These settings affect the exposure of the image and the quality of the details captured. By selecting the right camera settings, you can ensure that your photogrammetry results are accurate and comprehensive.
- Pre-flight checklist (checking equipment, calibrating the drone)
A pre-flight checklist is critical to ensuring the safety and effectiveness of your drone. You need to check all the equipment, calibrate the drone, and perform a safety check before take-off. By performing a pre-flight checklist, you can minimize errors and malfunctions during the flight, ensuring the safety of both the drone and those around it. A proper pre-flight checklist can also help you maximize the effectiveness of your drone and improve your photogrammetry results.
We recommend using compliance/drone management software to ensure you have easy access to these checklists. It’s the 21st century, best to avoid all the physical paperwork, for ease of use and also….. Save the trees, man!
Capturing Data
- Launching the drone and capturing images
Before launching the drone, it is important to ensure that everything is set up correctly. Make sure the drone is calibrated and the camera settings are optimized for the lighting conditions. Once everything is set up, launch the drone and begin flying it over the area you want to capture.
- Overlapping images and proper camera angles
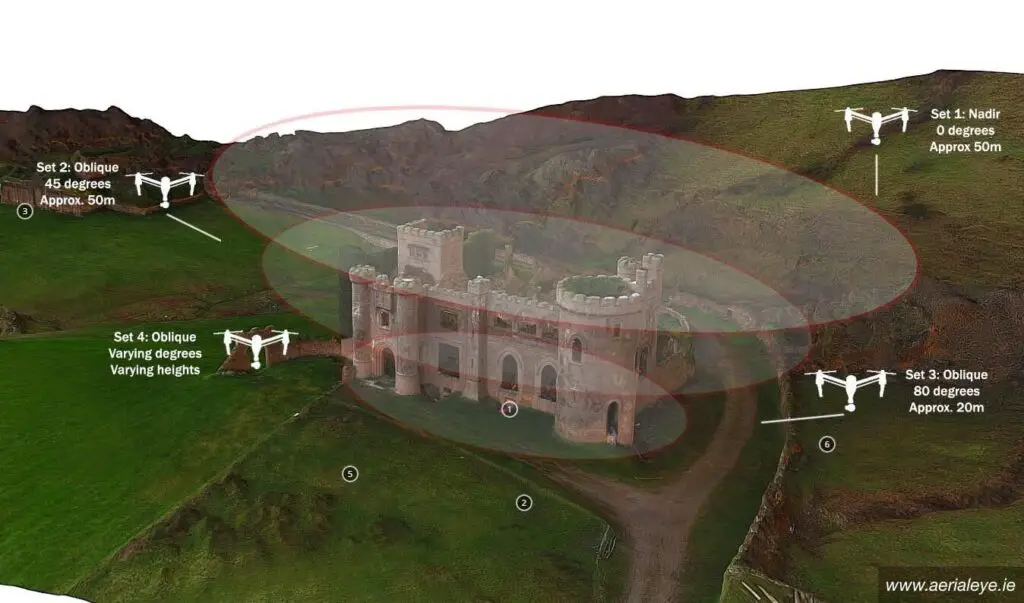
To create an accurate photogrammetric map, it is important to have overlapping images. This means that as the drone flies over the area, it should take multiple images of the same location from slightly different angles. This overlap ensures that the photogrammetry software can accurately create a 3D model of the terrain.
Proper camera angles are also important. For example, when flying over a building, it is important to fly at an angle that captures the roof and sides of the building rather than just the top. This ensures that the photogrammetry software can create an accurate 3D model of the building.
- Handling wind and obstructions
Photogrammetry can be affected by a number of factors such as wind, tall buildings or trees. Wind can cause the drone to sway, leading to blurry images that can affect the quality of the photogrammetry map. To handle this, ensure that the drone is flown on a day with low wind speeds and that the drone is calibrated properly. If there are obstacles in the way, try to capture images from different angles or heights to get a better view of the area.
Post-Processing Data
- Uploading images to software
The first step in post-processing is to upload your images to photogrammetry software. There are a few different options out there, such as Pix4D, Agisoft, and DroneDeploy. Each software has its own strengths and weaknesses, so it’s important to research and select the best one for your needs.
- Processing images and creating 3D models or maps
Once your images are uploaded to the software, the program will begin to process them. This involves stitching together the overlapping images to create a 3D model or map. The software will use algorithms to determine the best match between images, and create a seamless model or map. - Exporting data for use in other applications
Once your 3D model or map is created, you can export the data for use in other applications. This could include importing it into GIS software, or sharing it with colleagues or clients. It’s important to note that different software may have different file formats, so make sure to select the appropriate one for your needs.
Best Practices and Tips
- Ensuring safety and compliance with regulations
Safety should always be a top priority when using drones for photogrammetry. This means complying with all regulations and laws governing drone use in your area. Make sure to check with local authorities and obtain any necessary permits or certifications before flying.
In addition, it’s important to follow general safety guidelines like maintaining visual line of sight with your drone, avoiding flying over people or property without permission, and staying clear of airports or other restricted areas.
- Maintaining equipment and keeping batteries charged
Regular maintenance of your equipment is key to ensuring successful missions. This means checking your drone before every flight for any damage or malfunctions, and performing any necessary repairs or replacements.
In addition, keeping your batteries charged is crucial for a successful mission. Make sure to charge your batteries before each flight and bring backups if necessary.
- Experimenting with different camera settings and flight patterns
Finally, don’t be afraid to experiment with different camera settings and flight patterns to achieve the best results. This means playing around with shutter speed, aperture, and ISO to capture the best images, as well as trying out different flight patterns like grid, circular, or free-form.
Remember, the more you experiment, the more you’ll learn and improve your photogrammetry skills.
Conclusion
In conclusion, photogrammetry with drones is an exciting and accessible field that has many practical applications. By understanding the types of drones and features to look for, properly preparing for missions, capturing data with the right settings and techniques, and post-processing with the appropriate software, anyone can create stunning 3D models and maps. Remember to follow best practices and tips for safety and equipment maintenance, and don’t be afraid to experiment with different camera settings and flight patterns. With these fundamentals in mind, you’re ready to embark on your own photogrammetry journey and explore the endless possibilities of drone mapping.
If you’re ready to start mapping, check out our other article about How Much Professional Drones Cost, or if you’re looking to start a business around mapping, learn ways to grow with 5 Marketing Methods.